As an Amazon Associate, we earn from qualifying purchases. Some links on this site are affiliate links at no extra cost to you. Our recommendations are based on thorough research and editorial judgment.

Winter Storage Tips for Countertop Ice Makers
To store our countertop ice makers for winter, we start by turning them off and emptying any leftover ice. We should clean the bin and parts with a non-toxic cleaner, then dry everything for 24-48 hours. Prop the door open for air circulation and store the unit in a cool, dry place to prevent mold. Regular checks during storage can help us maintain our ice maker. Keep going to discover more essential tips for maintenance and storage.
Key Takeaways
- Turn off the ice maker, dump any remaining ice, and disconnect the water supply before storage.
- Clean all parts with a non-toxic solution and ensure they are completely dry for 24-48 hours.
- Prop the door open during storage to prevent mold growth and promote air circulation.
- Store the ice maker in a cool, dry place, away from temperature fluctuations to protect its functionality.
- Regularly inspect for signs of mold and conduct minor maintenance to ensure hygiene during winter storage.
Importance of Proper Winter Storage

When we think about winter storage for our countertop ice makers, we often overlook its importance. Proper winter storage is vital to protect our portable ice maker from potential damage. First, we need to turn off the unit, dump any remaining ice, and allow it to dry for 24-48 hours. This step helps prevent mold growth and moisture buildup. Next, keeping the ice maker in a cool, dry place is essential. It minimizes damage to its components during colder months. Propping the door open allows air circulation, reducing odors and mold risk. Additionally, using a waterproof cover protects it from dust and debris. Regular cleaning with mold control sprays beforehand can also enhance hygiene, ensuring a smooth restart when we need it again. An energy-efficient model can also save on utility bills and protect your investment during winter storage.
Cleaning Your Ice Maker Before Storage

Cleaning your ice maker before storage is essential for keeping it in top shape. First, we should turn off the ice maker machine and dump any remaining ice to avoid melting messes. Next, we’ll use a clean towel to thoroughly dry the ice bin and removable parts, as moisture accumulation can lead to mold growth. To guarantee cleanliness, wipe down the inside of the unit with a mold control spray that’s safe for potable water. After that, we need to allow 24-48 hours for the ice maker tray to dry completely. Finally, let’s prop the door open during storage to allow for proper ventilation, which further reduces the risk of mold and odors. Additionally, ensuring that the ice maker is self-cleaning function can simplify maintenance and enhance hygiene during future uses.
Recommended Products
Premium Hat-Shaped Ice for Faster Chilling: This commercial ice machine produces gourmet hat-shaped cubes that cool drinks faster than traditional blocks while melting slower. Each crystal-clear ice cube stays independent—no clumping, no chiseling. Perfect for whiskey, craft cocktails, and specialty coffee.

Premium Hat-Shaped Ice for Faster Chilling: This commercial ice machine produces gourmet hat-shaped cubes that cool drinks faster than traditional blocks while melting slower. Each crystal-clear ice cube stays independent—no clumping, no chiseling. Perfect for whiskey, craft cocktails, and specialty coffee.

【Crystal Clear & Unique Shaped Jelly Ice】This countertop ice maker comes with a 1.6L large water tank and advanced intermittent spray technology. It makes 8 solid 1.2-inch crystal jelly ice cubes in 20 minutes (first batch in 23 mins), with daily ice output up to 26 lbs. Compared with traditional ice makers, our jelly ice are clearer, more uniformly shaped, and melt significantly slower. Whether for cocktails, sodas, coffee, or wine, these perfect ice cubes elevate your drinks to a professional, refreshing level.
Steps to Drain Remaining Water and Ice

Draining any remaining water and ice from your ice maker is an essential step before storage. First, we should turn off the ice maker and unplug the unit to guarantee safety during the draining process. Next, let’s dump any leftover ice from the bin to eliminate unnecessary moisture. We can use absorbent paper towels to soak up any residual water in the ice tray for a clean surface. After that, it’s important to prop the ice maker’s door open. This allows for proper ventilation, helping to dry any remaining moisture inside. Additionally, ensuring that the ice maker is completely dry before storing will help maintain its longevity and performance. Finally, we should allow at least 24-48 hours for all parts to dry completely before placing the ice maker in a cool, dry place for storage.
Recommended Products

High-Efficiency Under Counter Ice Maker:This commercial under counter ice maker machine produces up to 100 lbs of clear ice per day, delivering 40 ice cubes every 10–18 minutes. The 24 lb storage bin provides a reliable supply, making this ice maker commercial ideal for home kitchens, bars, restaurants, hotels, and cafés.

Fast Ice Making & Storage: 15”W stainless steel under the counter ice maker produces an impressive 130 pounds of ice each day, and has the capacity to store 30 pounds. Our commercial under counter ice maker machine can be installed indoors or outdoors. This ice maker is front vented and has a forced air refrigeration system. Idel for fridge owner, entertainer, bartender, connoisseur, or space saver.
FAST ICE PRODUCTION FOR ANY OCCASION - Get fresh ice fast with this powerful portable ice maker delivering 12 bullet cubes in as little as 7 minutes. Crank out up to 50 lbs. daily, perfect for kitchens, offices, RVs, and entertaining. The compact stainless steel design fits easily on any countertop without sacrificing performance.
Best Practices for Drying the Ice Maker

To guarantee our ice maker is ready for storage, we must focus on drying it thoroughly. First, verify the ice maker is completely turned off and empty. We’ll use a clean towel to dry the ice bin and internal components. This step helps avoid moisture buildup, which can lead to mold. Next, we should utilize absorbent paper towels for the tray to remove residual water—let’s aim for it to be as dry as possible. Once we’ve wiped everything down, it’s vital to let the ice maker air dry for 24-48 hours. We’ll prop open the door for proper ventilation, making sure all moisture evaporates. Regularly inspecting our ice maker during storage will help us prevent any mold growth. Additionally, having self-cleaning functions can significantly enhance hygiene and ease of upkeep.
Recommended Products

Touchless Ice Dispensing: This ecozy Mistalo Drop Slim ice maker features a touchless ice dispenser—simply place your cup under the ice chute and press a button to get fresh nugget ice instantly. No need to touch the scoop, delivering ice quickly and safely every time

Produces Dry Ice Flakes or Snow On Demand: Create dry ice in your preferred form flake or snow ideal for cooling, packing irregularly shaped items, and laboratory or shipping applications

Dual Mode for Versatile Bag Compatibility: Switch easily between chamber mode for textured/embossed bags and nozzle mode for smooth/Mylar bags; ideal for long-term food storage, freeze-dried prep, or commercial-style packaging in grocery-like clear bags
Ideal Storage Conditions for Your Ice Maker

After ensuring our ice maker is dry and clean, it’s time to focus on where we’ll store it. We need to find a cool, dry place for prime storage conditions. This helps prevent damage from fluctuating temperatures. Always prop the ice maker door open during storage. It promotes air circulation and reduces the risk of mold growth. Before we store ice, we should make sure the unit is completely cleaned. Remove any residual water, and dry the ice bin with a clean towel. Allow the tray to dry thoroughly for 24-48 hours. Avoid non-temperature-controlled areas, as they can lead to damage and reduce the ice maker’s longevity. Following these steps will keep our ice maker ready for use, especially since regular maintenance is essential for overall efficiency.
Using Covers and Containers for Protection
While we want our ice maker to be protected during winter storage, using the right covers and containers can make a significant difference. A heavy-duty dust cover, ideally made from 600D PU oxford fabric, effectively shields our unit from dust, oil, and the occasional curious pet. When storing ice cubes, we should use a clean, closed container to minimize moisture exposure and extend freshness. Inside this container, consider adding a paper lining or damp-proofing solutions for extra moisture protection. Remember to prop the ice maker door open during storage. This promotes ventilation and helps prevent mold growth inside. Regularly check and clean all areas before winter to eliminate any residual moisture that could promote bacterial growth. Additionally, ensure that storage solutions are energy-efficient designs, which can help maintain the quality of your ice while minimizing power consumption.
Recommended Products

Protects and provides additional insulation for your ICECO VL75 Pro Dual Zone portable freezer.

High-quality material --- The breathable 600D Oxford material allows the Refrigerant Recovery Machine Cover to quickly dissipate internal water vapor and keep the A/C RRR Machine bench dry.These Refrigerant Recovery Machine Cover are coated with a waterproof PVC coating on the bottom, the water pressure is increased to 8000 Pa and a waterproof strip is added to the seam, making it difficult for water to enter the needle hole.

Precise Fit & Measurement Guide: This cover is designed for freezers with external dimensions of approximately 56x29x36 inches. As dimensions may vary across different brands/models, we strongly recommend measuring the actual external dimensions of your freezer before purchase to ensure a perfect fit.
Regular Maintenance for Longevity
Regular maintenance is essential to keep our ice makers running smoothly and efficiently, especially if we want them to last. We should regularly clean our unit using a bleach and water solution. This prevents bacteria growth and guarantees optimal ice quality. Always empty the ice bin and thoroughly dry it, allowing 24-48 hours for complete drying. This step is vital to avoid mold growth during storage. Prop the door open for better air circulation, which helps prevent odors. Before we store it, we must disconnect the water supply and run the machine until it stops producing ice. Scheduling a deep-clean right before peak seasons, like spring or summer, is a great way to promote longevity and maximum efficiency. Additionally, regular descaling using a suitable solution can further maintain ice quality by removing mineral deposits and scale build-up.
Seasonal Preparation for Reuse
Preparing our ice maker for reuse after the winter months is vital for guaranteeing it functions effectively. First, we need to inspect and clean the storage bin and water reservoir thoroughly to eliminate any lingering bacteria or odors. It’s important to dry these components completely before sealing the ice maker. After cleaning, let’s confirm proper ventilation by propping the ice maker door open during storage. This simple step helps reduce moisture buildup that could lead to mold. Allow 24-48 hours for all interior parts to dry. When it’s time to use the machine again, recheck for any leftover debris from storage. Additionally, self-cleaning features in modern ice makers streamline the process, ensuring that maintenance is quick and efficient. By taking these steps, we ensure our ice maker is ready for a fizzy, crunchy season ahead!
Tips to Avoid Mold Growth During Storage
To prevent mold growth during storage, we should take several essential steps. First, we ought to clean our countertop ice maker with a mold control spray. This removes any residual moisture that could lead to mold growth. Next, we can wipe the interior with a non-toxic cleaning solution that’s safe for potable water. Once clean, it’s best to keep the ice maker unplugged in a cool, dry place with the door propped open for air circulation. We should also consider placing moisture-absorbing products in the storage area to further reduce humidity. Additionally, regularly checking for signs of mold is crucial, as even slight moisture can compromise the appliance’s hygiene and functionality; efficient design can help maintain cleanliness and appliance longevity. Finally, let’s regularly check for signs of mold during storage and clean as necessary to keep our ice maker in great condition.
Recommended Products

【Crystal Clear Bullet Ice】Featuring advanced spray-type ice-making technology, this under counter ice maker consistently produces clear, full-bodied bullet ice with minimal air bubbles. The slow-melting ice helps preserve the original flavor of premium drinks, making it ideal for whiskey, cocktails, and other beverages. With a 26 lb ice storage capacity, it easily meets the demands of home entertaining and gatherings.

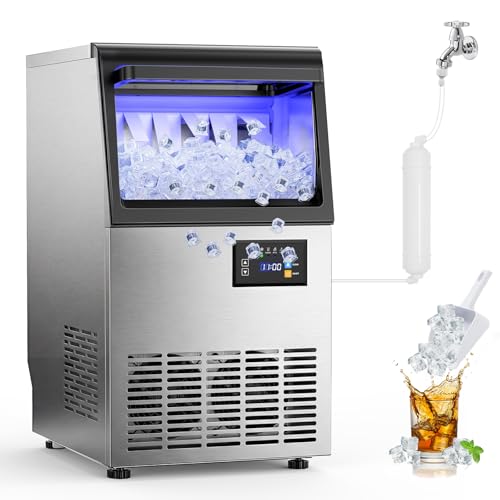
🧊[ Powerful Ice Production, Large Capacity - 150LBS Daily Output, 120LBS Storage ]- Our commercial ice maker features a high-performance compressor and advanced circulation system, producing up to 150 pounds of ice daily with a 120-pound oversized storage bin. Its 32 efficient ice molds enable rapid ice production, effortlessly meeting high-volume ice demands for cafes, hotels, bars, and restaurants—ensuring ample supply during peak hours.

Premium Hat-Shaped Ice for Faster Chilling: This commercial ice machine produces gourmet hat-shaped cubes that cool drinks faster than traditional blocks while melting slower. Each crystal-clear ice cube stays independent—no clumping, no chiseling. Perfect for whiskey, craft cocktails, and specialty coffee.
Maximizing the Lifespan of Your Ice Maker
Maximizing the lifespan of our ice maker starts with proper care and maintenance. Before storage, we should thoroughly clean our countertop ice maker to eliminate bacteria and blockages. Disconnect the water supply, and run the unit until no ice is produced, preventing freeze damage. To help with air circulation, propping the door open during storage is key. We can use absorbent materials, like paper towels, to remove water from the tray and ice bin. Allow 24-48 hours for thorough drying before storing. It’s best to keep the ice maker in a cool, dry location, avoiding non-temperature-controlled areas. By following these steps, we can effectively contribute to maximizing the lifespan of our ice maker. Additionally, ensuring that the unit is stored in a location that avoids exposure to temperature extremes can further enhance its longevity.
Frequently Asked Questions
How to Winterize a Portable Ice Maker?
To winterize our portable ice maker, we’ll guarantee proper drainage, clean it thoroughly, and apply insulation tips. We’ll also take storage precautions by placing it in a cool, dry area to prevent moisture and damage.
Where to Store Ice After an Ice Maker?
We recommend using airtight storage container options for ice storage solutions. To maintain ice freshness, consider ice preservation methods like keeping containers dry and utilizing paper to absorb moisture, minimizing waste and extending ice life.
Should I Keep My Countertop Ice Maker on All the Time?
Keeping our countertop ice maker on all the time can waste up to 30% more energy. Let’s prioritize energy efficiency with regular maintenance tips to maintain ice quality and guarantee proper compressor care for longevity.
How to Keep a Countertop Ice Machine From Molding?
To avoid molding in our countertop ice maker, we should adopt mold prevention techniques like regular ice maker cleaning, implement humidity control methods, and follow maintenance tips, ensuring a clean, dry, and well-ventilated environment.


