As an Amazon Associate, we earn from qualifying purchases. Some links on this site are affiliate links at no extra cost to you. Our recommendations are based on thorough research and editorial judgment.

Measuring Decibels: Simple Ways to Test Ice Maker Noise
To test your ice maker’s noise levels effectively, we can use smartphone apps like Decibel Meter Pro or Sound Level Meter. We should hold the phone about one foot away and at ear level for accurate readings. During operation, note measurements around 69 dB when filling and up to 59 dB while making ice. If sounds exceed 45 dB persistently, there might be underlying issues. Keeping an eye on these levels will help us maintain our ice maker’s performance. More insights are ahead.
Key Takeaways
- Use smartphone apps like Decibel Meter Pro to convert your device into a sound level meter for measuring ice maker noise.
- Position the sound level meter at ear level (4-5 feet high) and at least one foot away from the ice maker for accurate readings.
- Take multiple readings from various angles and distances to fully capture noise generated during ice making and filling cycles.
- Record ambient noise levels and consider them to gauge the relative loudness of your ice maker’s operation effectively.
- Regular monitoring helps identify irregular noises and potential issues, ensuring your ice maker functions efficiently and quietly.
Understanding Ice Maker Noises
When it comes to ice maker noises, it’s essential to distinguish between normal and abnormal sounds. Regular operation includes gentle filling sounds and the occasional clunk as ice drops into the bin. We should be concerned when we hear grinding, buzzing, or rattling noises, as these may indicate mechanical issues. The noise level can often rise due to ice buildup or misaligned parts. Common sources of persistent buzzing are low water pressure or obstructed supply lines, which hinder the ice-making process. We recommend regular inspections for loose parts to help avoid unnecessary repair service. Staying aware of these aspects guarantees our ice maker operates efficiently, keeping those crunchy ice cubes coming without disruption. Ensuring proper ice-making efficiency can significantly enhance your satisfaction with your appliance’s performance.
Using Smartphone Apps for Measurement

Measuring ice maker noise levels has never been easier with the use of smartphone apps. Apps like Decibel Meter Pro and Sound Level Meter turn our phones into sound level meters. They utilize the built-in microphone to capture noise, displaying decibel levels for our reference. While the accuracy can vary, most of these apps reliably identify significant sounds, such as noisy ice maker activity. To truly understand the noise generated, we should take measurements from different distances around the ice maker. It’s essential that the app is calibrated correctly, as some require initial setup to guarantee accurate readings. By following these steps, we can effectively gauge and address any noisy ice maker issues. Additionally, consider the power and performance of your ice maker, as this can directly influence the noise level it generates.
Recommended Products

Essential set of classic vocal effects, including 3 reverb, 3 Echo, and 3 double types

💎【4 in 1 Fandelier】: Ceiling fan, Bluetooth Speaker, Crystal and LED lights 4 in 1,Top k9 crystal, Acrylic transparent retractable blades, High quality polished metal lamp body, A variety of decoration styles can be perfect match. Suitable for 10-28 ㎡ living room, bedroom, dining room, restaurant, cafe, bar, shop, condo, hall, villa, etc.

Proper Positioning for Accurate Readings

To achieve accurate noise readings from your ice maker, it’s important to position the sound level meter (SLM) correctly. First, let’s place the SLM at least one foot away from the machine. This distance helps avoid distortion from the ice maker’s noise. We should ascertain the SLM is at ear level, around 4-5 feet high, to capture the sound intensity we actually perceive. Using a tripod or stable surface is vital. This minimizes vibrations that could skew our readings. It’s also wise to take multiple readings from various angles and distances. This accounts for sound reflections from walls or objects. Finally, we must record the ambient noise level to assess how much the ice maker contributes to the overall sound. Additionally, selecting models with lower noise output can significantly enhance the listening experience in your home environment.
Recommended Products

IN-CAMERA SHAKE REDUCTION (SR): The PENTAX digital SLR K series cameras are equipped with the SR mechanism built into the camera body. Because shake reduction is applied in the camera body, this means that any lens compatible with the K-Series cameras will benefit from image stabilization.

LEADING AUTO-FOCUS(AF) TECHNOLOGY:Don't settle for competitors that blur at 20x zoom. Our industry-leading auto-focus delivers pinpoint accuracy where others can't, with customizable sensitivity, focus zones, and range control. Featuring Motion Sync and multiple focus modes, this is the clarity advantage serious creators trust. See the difference when your camera doesn't give up at the most crucial moments.

Ultra-efficient Class-D amplifier powers an 8” Custom high-output woofer and 1" Compression driver
Measuring Noise During Different Operational Phases

After ensuring proper positioning of the sound level meter, the next step involves observing noise levels during different operational phases of the ice maker. First, measure the noise during the water filling phase. You might notice typical levels around 69 dB when standing one foot away. Next, during ice-making cycles, listen closely for grinding or buzzing noises. These sounds may indicate issues as noise can exceed 59 dB at 4-5 feet. Document the type of noise you’re hearing and the corresponding levels throughout each phase. If the gentle splash is louder than expected, it might require practical solutions. Additionally, consider the operating noise levels of models that generally fall under 40 dB for quieter performance. Consistent measurements will help you compare the decibel levels against similar appliances to assess whether your ice maker operates within acceptable limits.
Recommended Products

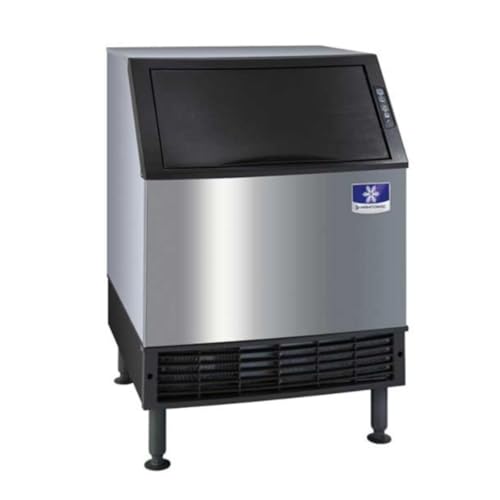
Commercial Use & ETL Certification - Euhomy commercial ice maker offers over 360 pounds/24h ice production, providing efficient ice for your business operations. With the first-calss SECOP compressor, the commercial ice machine produce ice in just 10-15 minutes, and the thickness of ice cubes can also be adjusted according to different purposes. Whether it's a hotel, restaurant, bar, or coffee shop, it can meet your demand for large-scale ice production.Moreover Euhomy's ice machine maker has ETL certification and are approved for commercial use.

【Expanded Power System with Two Batteries】This bundle includes the AFERIY P310 Portable Power Station along with two compatible Expansion Battery Packs, configured to significantly increase your total energy storage capacity. The power station and expansion batteries are shipped in three separate packages.
EZ GLIDEDOOR - Experience unparalleled convenience as the door smoothly lifts and slides with just a gentle touch, ensuring effortless access even when your hands are occupied. Simplify your workflow with this user-friendly design, making every interaction with the ice machine a seamless and hassle-free experience.
Interpreting Noise Levels Against Decibel Charts

When examining ice maker noise, understanding decibel levels can help us assess its performance. Decibel charts reveal that ice makers typically operate around 60-70 dB. Our measurements show one model’s noise level peaking at 69 dB from one foot away. That’s like the sound of a vacuum cleaner or heavy traffic, which is quite loud in a home setting. If we step back to four or five feet, that level drops to around 59 dB, indicating reduced intensity. We should be cautious, as continuous exposure to noise levels above 85 dB can lead to hearing damage. By consulting decibel charts, we can understand our ice maker’s noise levels better and determine if any adjustments are necessary for quieter operation. Additionally, many models operate under 50 decibels, making them suitable for residential environments where noise disruption might be an issue.
Common Noise Issues and Their Meanings
Although ice makers are designed for quiet operation, various noise issues can arise that indicate potential problems. Common issues include buzzing sounds, suggesting water supply problems, or rattling, which often means loose parts or an uneven refrigerator placement. If we hear grinding or screeching, it may point to mechanical issues that need immediate attention. Normal operation produces gentle sounds like splashing during water filling. However, loud noises often indicate high water pressure or malfunctioning components. Popping or cracking noises might result from temperature fluctuations, while gurgling sounds indicate drainage processes. Regular maintenance and securing components helps mitigate abnormal noises, improving the ice maker’s sound levels and overall functionality. Staying attentive to these signs guarantees peak performance. Additionally, ensuring that the machine has an optimal capacity considerations can also contribute to smoother operational noise without interruptions.
Diagnosing Problems Based on Noise Measurements
Monitoring noise levels can give us valuable insights into the performance of our ice maker. By measuring with a decibel meter, we can identify specific sounds and their decibel readings. A buzzing sound at around 70 dB often signals a water supply issue. If we hear grinding or screeching noises exceeding 60 dB, it may indicate critical damage that needs our immediate attention. It’s also important to note if the noise level consistently exceeds 70 dB during operation; this warrants a thorough investigation. Finally, by measuring at different distances, we can establish a normal operational range and easily pinpoint when noise levels exceed expected thresholds, helping us diagnose any issues quickly and effectively. Additionally, keeping an eye on the precision control temperature can help us understand how temperature fluctuations may influence the operational noises of the ice maker.
Recommended Products
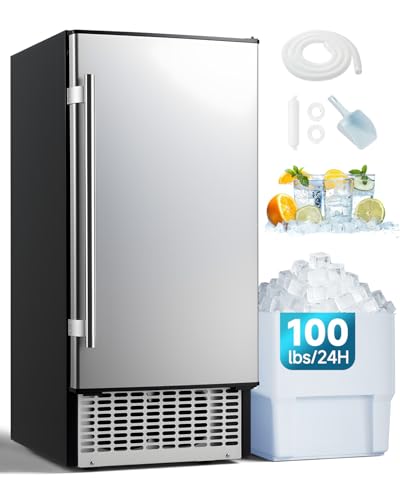
Efficient Ice Making - Designed for reliable performance, JFHID commercial ice maker produces up to 100 lbs of ice per 24 hours, with a fast cycle of 8–16 minutes per batch. Equipped with a 30 lbs storage bin, it ensures a steady ice supply for home use, small businesses, parties, or bars without frequent refilling

6 MINS ICE-MAKING & NUGGET ICE: Quench your thirst fast with efficient EUHOMY nugget ice maker! You can enjoy fresh sonic ice and cold drinks in 6 to 8 mins. Featuring a 1.2Qt water tank, it easily makes up to 34 lbs of ice daily and has a 1.8 lbs removeable basket. The unique, crunchy soft pellet ice won't hurt your hands or mouth and cools drinks quickly while retaining their taste, providing a joyfully chewable experience. It's so perfect for icing coffee, smoothies and munching on ice as a snack

2 Ways to Add Water and Bottle Not Included: The countertop ice maker machine holds up to 3.2 liters of water, minimizing how often you need to refill it. At the same time, you can also put in buckets of water less than 2 inches in diameter. You won’t worry there is not enough water to make ice cubes. AUTOMATIC CLEANING FUNCTION : Press the "TIMER" button for more than 5 seconds to enter the automatic cleaning function. Please clean your ice machine regularly
When to Seek Professional Help
If we notice continuous loud noises from our ice maker, it’s time to take action. Grinding or screeching sounds could indicate significant mechanical problems. We shouldn’t ignore these noises, as they may lead to vital damage. If we can’t find any visible issues after cleaning and conducting basic maintenance, it’s advisable to consult an expert ice maker technician. They can perform a professional evaluation to determine if repairs are necessary. For urgent or complex issues that surpass our troubleshooting skills, prompt action is essential. Relying on qualified appliance repair services guarantees safe and effective resolutions. Annual inspections can enhance performance too. By catching problems early, we can avoid costly repairs down the line. Additionally, understanding the noise level during operation can help in identifying any irregularities in the sound your ice maker produces. Let’s prioritize our ice maker’s health.
Maintaining an Optimal Ice Maker Condition
To maintain our ice maker in top condition, we need to establish a consistent routine. Regular cleaning and inspections should happen at least once a month. This helps prevent noise issues caused by ice buildup. We should also check the water inlet valve and connections to verify they’re functioning properly, reducing buzzing from insufficient water flow. It’s crucial to inspect and level the refrigerator. A well-leveled appliance minimizes vibrations and rattling noises, leading to quieter operation. If we notice unusual noises, we’ll need to address them promptly, as persistent loud sounds may signal deeper mechanical problems. Documenting our cleaning and maintenance efforts will help us track performance and anticipate future service needs. Additionally, ensuring proper ice production efficiency can contribute to minimizing noise levels as well.
Recommended Products

25 lb. ice storage capacity, 52 lbs. production per 24 hours.

🧊 𝑯𝒊𝒈𝒉-𝑪𝒂𝒑𝒂𝒄𝒊𝒕𝒚 𝑰𝒄𝒆 𝑷𝒓𝒐𝒅𝒖𝒄𝒕𝒊𝒐𝒏 𝒇𝒐𝒓 𝑩𝒖𝒔𝒚 𝑶𝒑𝒆𝒓𝒂𝒕𝒊𝒐𝒏𝒔 – This Commercial Ice Machine produces up to 580 lbs of ice every 24 hours and stores up to 400 lbs at once, ensuring a steady ice supply for restaurants, bars, hotel kitchens, seafood displays, and large events. Reduce downtime and keep service running smoothly.

🎵【High Output 450LBS of Ice Every 24 Hours】Never run out of ice during peak business hours. This commercial ice maker produces up to 450 pounds of full cube ice per day, easily handling the demands of busy restaurants, bars, cafes, and hotels. Each batch makes 182 full cubes in just 8-15 minutes.
Final Tips for Monitoring Ice Maker Noise
As we endeavor to maintain our ice maker’s performance, monitoring noise levels can help us detect potential issues early. To accurately measure sound, let’s use a calibrated sound level meter or a reliable mobile app. We should capture noise level readings at both 1 foot and 5 feet away from the ice maker. Typically, readings close by are around 69 dB, while those further away drop to 59 dB. Document these figures and compare them to standard noise levels from daily activities. Regularly monitor for any changes; persistent loud sounds may suggest issues like ice buildup or loose components. Always keep ambient noise levels in mind, targeting measurements at least 10 dB above it to confirm concerns. Ensuring that your ice maker operates below 45 dB contributes to a peaceful RV environment, enhancing your overall travel experience.
Frequently Asked Questions
What Is the Easiest Way to Measure Decibels?
The easiest way to measure decibels is using our smartphones with apps like Decibel Meter Pro. They help us analyze sound levels on the decibel scale while being mindful of noise reduction techniques for accurate readings.
Can I Use My Phone as a Db Meter?
Absolutely, we can use our phone apps for sound measurement! They capture noise levels effectively, turning our devices into handy decibel meters. Just remember, accuracy improves when we minimize background sounds and calibrate our apps regularly.
How to Quiet a Noisy Ice Maker?
To quiet our noisy ice maker, we should consider soundproofing techniques, enhance insulation, and follow noise reduction tips like securing loose parts and regularly cleaning to improve efficiency and minimize disruptive sounds.
Can I Measure Db With an Iphone?
Yes, we can measure dB with iPhone apps designed for sound calibration. By using these apps for noise measurement, we can easily monitor sound levels and guarantee accurate readings in various environments.


